Today’s web traffic is virtually impossible without encryption. The need to cryptographically protect the data in transit whenever real or not has become a norm and a requirement for any kind of service to be properly implemented. From a simple portfolio website that has its ranking downgraded by the search engines to public API gateways that move around sensitive data. Everything has to be verified and encrypted.
This increase in the usage however has to deal with the complexity of the technological implementation. SSL and later TLS, with public CA signed certificates and cross-signed private PKI implementations were always something many IT professionals struggled to comprehend and use properly. It just seemed to add a hardly justifiable overhead.
Then the automation came. With the “automate all the things” approach the TLS certificates were given another push with all kinds of APIs and scripts that allowed for dynamic creation, distribution, and maintenance of certificates and complete in-house Certificate Authorities.
But as it always goes with automation the tool that solves one problem isn’t always good for solving another just because it was tagged with the same words in the ticket. So the scripts and services should be chosen to satisfy the specific need. There is however a simple case that will cover most of the uses, i.e. a humble HTTPS certificate. Bring up a website, a REST API or your installation packages download endpoint and you need a certificate to go with it. And if it is a public service you need it to be signed by a public CA. And if it is in the cloud you have to manage it dynamically. And if you do then it is better to manage it as code.
Here at Bitrock when it comes to automation we start with terraform first and see what can we drop on top of it to achieve the goal with all the things IaC as much as we can. And this is where we start with the certificates too. Once the use case is identified, analyzed and solved we can easily reuse it using terraform in other projects. Which given the flexibility of the tool and similarities between cloud platforms should work most of the time. This article illustrates our approach at automating the certificate as code management in the specific case of public HTTP service behind an in cloud load balancer.
A bit of context
First a refresher on the details before the implementation of the process can start.
Let’s start with the Certificate Authority (CA) which, for the sake of simplifying, is a provider of digital certificates. There are many components in a CA but we are only interested in one. As a service consumer you ask CA to certify that you own a property on the internet. In most cases it will be a domain name. Such as “bitrock.best”. The result of this certification is a signed TLS certificate, usually a file you keep in reach of your web server. The standard process is performed in three iterations:
- Consumer generates a private key and a certificate signing request
- Consumer sends the certificate signing request to the CA
- CA verifies the ownership of the property described in the requests and issues the certificate to the consumer
What the consumer is left with are at least two items: the private key and the certificate. The certificate can be read by anyone but can only be used for encryption by the private key owner. And the private key is what should be kept private.

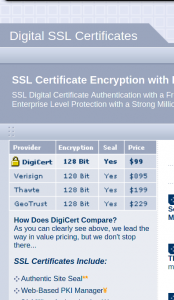
The process of issuing a certificate by itself is simple but the verification of the property ownership is what usually complicates it. Since the 90s having a certificate that was signed and trusted by any client meant to pay for the service and service provider used to verify via email, fax, phone calls and even in person that the consumer owns a domain name or a business name.
The way of Let’s Encrypt

While it still makes sense today for banks or large e-commerce companies, for a simple website or service everything changed a few years ago when the Let’s Encrypt project went public. The project has built a protocol and a service provider which together allow having a certificate signed by a publicly trusted CA with a couple of API calls.
Having a certificate issued and signed by Let’s Encrypt on your “normal” server is extremely easy. You just install the “certbot” package using your package manager and run it. If you are using a supported web server software such as apache or nginx the certbot will even set it up for you. Otherwise you can get the certificate by just pointing certbot to where your web root is and then point the web server configuration to your freshly signed certificate and its private key.
The “normal” usage of the certbot however implies the “normal” server which doesn’t match the “cattle vs pets” model of modern infrastructure. In a modern architecture the node where your web server is running should be an immutable and disposable element of your architecture. The certificate and the key then should be configured on an external entity. Think a cloud compute instance and a cloud load balancer. The load balancer accepts the client requests, does all the TLS termination heavy lifting and forwards the request to any compute instance there available.
The above use case eliminates the possibility of using certbot as easily as with a “normal” server. The verification process is trickier to implement using the web server files and the certbot process does not have access to where the certificate and key files are stored. This forces a different verification usage approach based on DNS. In the case of files the ownership verification relies on the consumer owning the web server responsible for serving the content of the domain name. A file with cryptographic content is stored by the certbot on the server and Let’s Encrypt servers reach for it to verify that indeed the cerrtbot is running on the domain name’s web server. The DNS verification uses the same cryptography verification but the consumer has to publish a TXT record for the domain name which will be verified by Let’s Encrypt to certify the ownership of the domain name.
Hashicorp Terraform, GCP and … Let’s Encrypt
The above looks very much like technical requirements: deploy a web service in the cloud to provide public services using HTTPS. The TLS certificate should be issued by Let’s Encrypt using DNS verification and the termination should be handled by the cloud provider’s load balancer. The deployment must be performed using terraform with no manual operations that interrupt the process.
To satisfy the requirements we are going to use the GCP services and the HashiCorp’s google provider to provision the infrastructure. Then we will use GCP’s Cloud DNS to configure the records using an excellent terraform ACME protocol provider. Terraform Cloud will take care of the state so it can be kept separated from the infrastructure it describes.
The domain name registrar used has its own API implemented but a terraform provider doesn’t seem to exist for it. So we can use a bash script that leverages curl to configure nameservers of the domain name to point to a freshly created zone in GCP’s Cloud DNS.
The resulting terraform code and all the scripts are available on Bitrock’s github.
[enlighter lang=”generic”]./
├── cert-gcp.tf
├── domain.tf
├── gcp.tf
├── LICENSE
├── providers.tf
├── README.md
├── scripts
│ └── startup-script.sh
├── terraform.tfvars
└── variables.tf
1 directory, 9 files
[/enlighter]
What we did
We have separated the cloud infrastructure into a straightforward terraform file that contains all the resources specific to google. This takes the solution closer to the multi cloud pattern making the infrastructure easily replaceable. The exact layout certainly should be built on the modules pattern. Which shouldn’t be an issue to refactor and integrate. To summarize the infrastructure here is what is being provisioned as resources in our GCP Project:
- network, subnet and firewall
- an instance group manager with an instance template and a startup
- script that prepares our web service
- a managed DNS zone
- load balancer that uses the instance group as backend
- the certificate resource used by the balancer
[enlighter lang=”shell”]
# terraform.tfvars
# Domain name
domainname = “your-domain-name”
# GCP access
project_id = “GCP project id”
google_account_file = “path to the GCP credentials json”
# Registrar login
domain_user = “login”
domain_password = “password”
# Let’s encrypt registration and production endpoint
email_address = “you+acme@gmail.com”
le_endpoint = “https://acme-v02.api.letsencrypt.org/directory”
[/enlighter]
When a domain name is being registered one has to provide valid nameservers that are supposed to be authoritative for it. With GCP and some other cloud providers it can be a problem since every zone created has its own authoritative servers assigned to it. So after the zone is created its authoritative servers have to be set through the registrar and everything has to wait until the change. We manage it with a single HTTP request and a DNS resolving test in a loop. Both implemented as local-exec provisioners of a null resource in the domain.tf file.
[enlighter lang=”shell”]
# This is how our registrar can be called to update the nameservers. YMMV
curl ‘https://coreapi.1api.net/api/call.cgi?s_login=login&s_pw=password&command=ModifyDomain&domain=your-domain-name&nameservers’
# And now we wait
while true; do
dig +trace ns your-domain-name | grep ‘^your-domain-name\.’ | grep your-new-namserver && exit 0
echo Waiting for nameservers to be updated …
sleep 15
done
# Checkhout domain.tf to see the complete usage
[/enlighter]
Once the zone is up and nameservers are updated the ACME provider can proceed with the certificate request. The certificate’s generation is described in the gcp-cert.tf file that includes the creation of two keys, one for Let’s encrypt registration and the other for the certificate itself. Being resources and passed as arguments the keys will be kept in the secure remote state on Terraform Cloud. Small details to keep in mind:
- the TTL of the records you create (SOA, NS, A, etc.) should be low to avoid waiting for propagation and to reach the service sooner
- Let’s Encrypt has rate limits in place so play with the staging endpoint first
- to configure your LB’s TLS properly don’t forget to add the certificate chain (your issuers certificates)

Once all is in place point your browser to the https://your-domain-name should result in a happy lock icon and your smiling face.
Authors: Michael Tabolsky & Francesco Bartolini, DevOps @ Bitrock

